- 3/4 inch plywood
- 4 x 4 square post
- 2 x 4 boards
- 1/4 inch rope
- Rugs
- Log (optional)
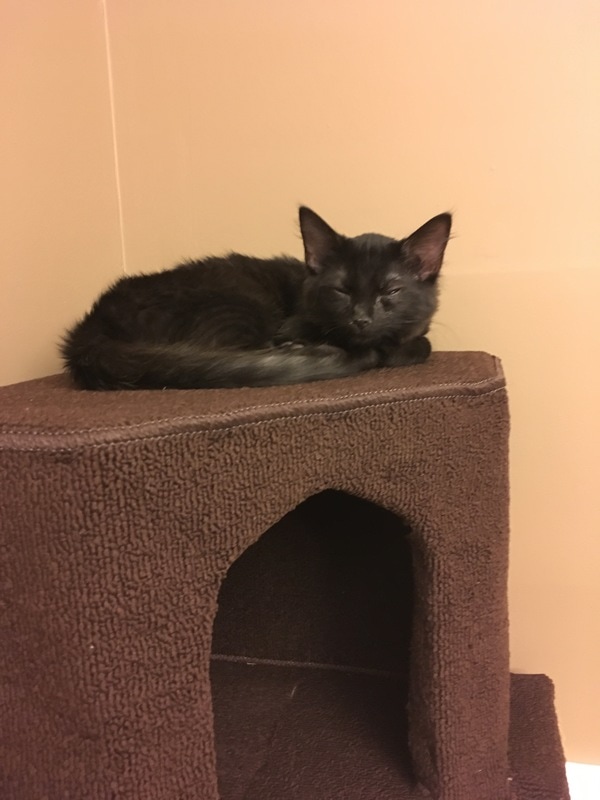
My wife and I recently decided to expand our family by adopting a pair of kittens from a local organization, Furkids, These two little balls of energy have been nothing but a blast so far. One thing we really wanted to do for them is give them something they could climb up on top of, play on, and scratch as much as their hearts desired. So to accomplish all of these goals, I set about designing and building a cat condo. List of materials: 
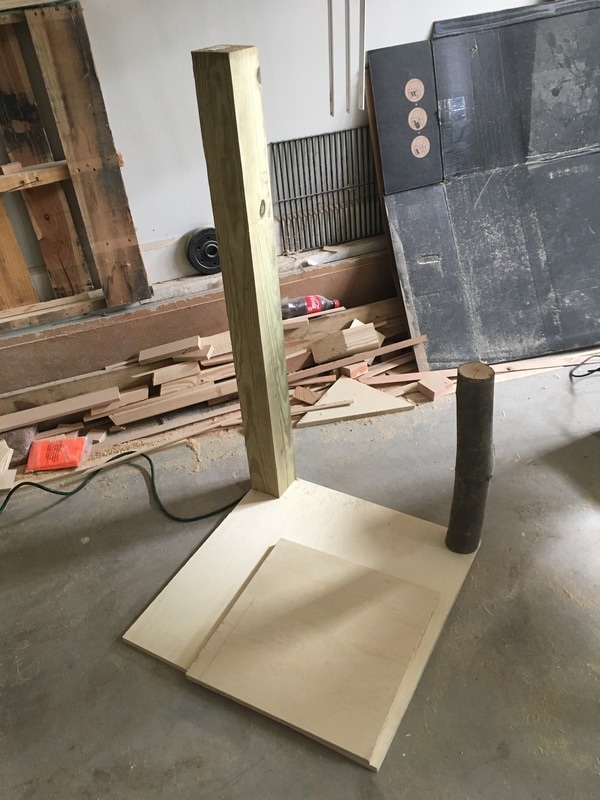
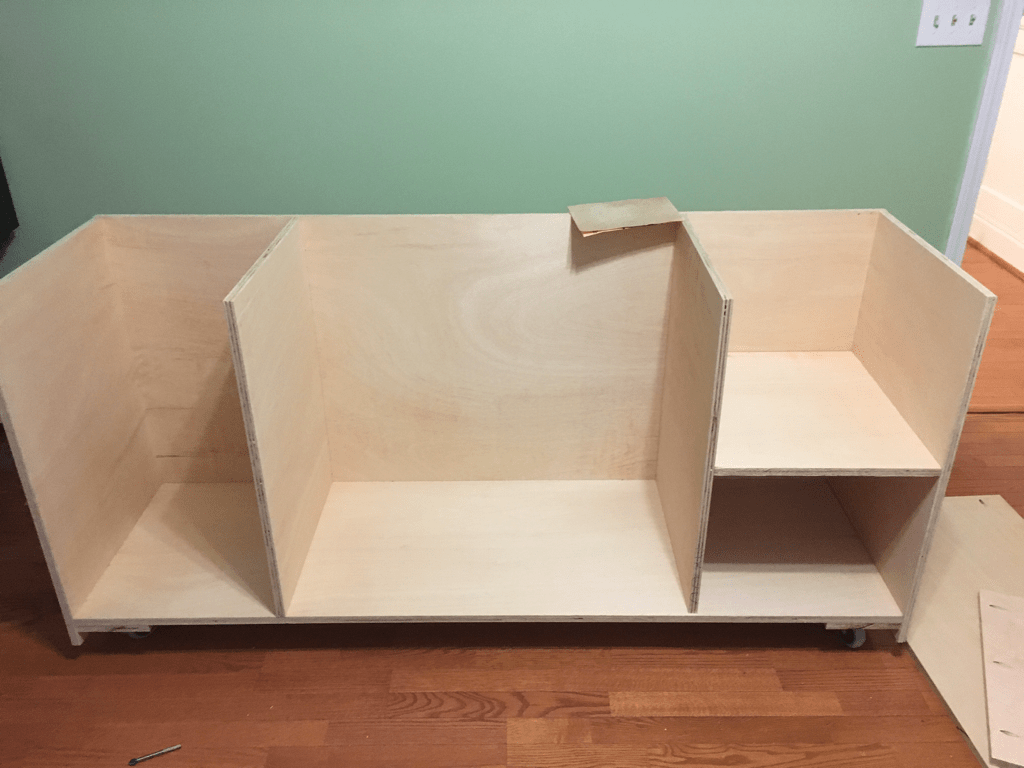
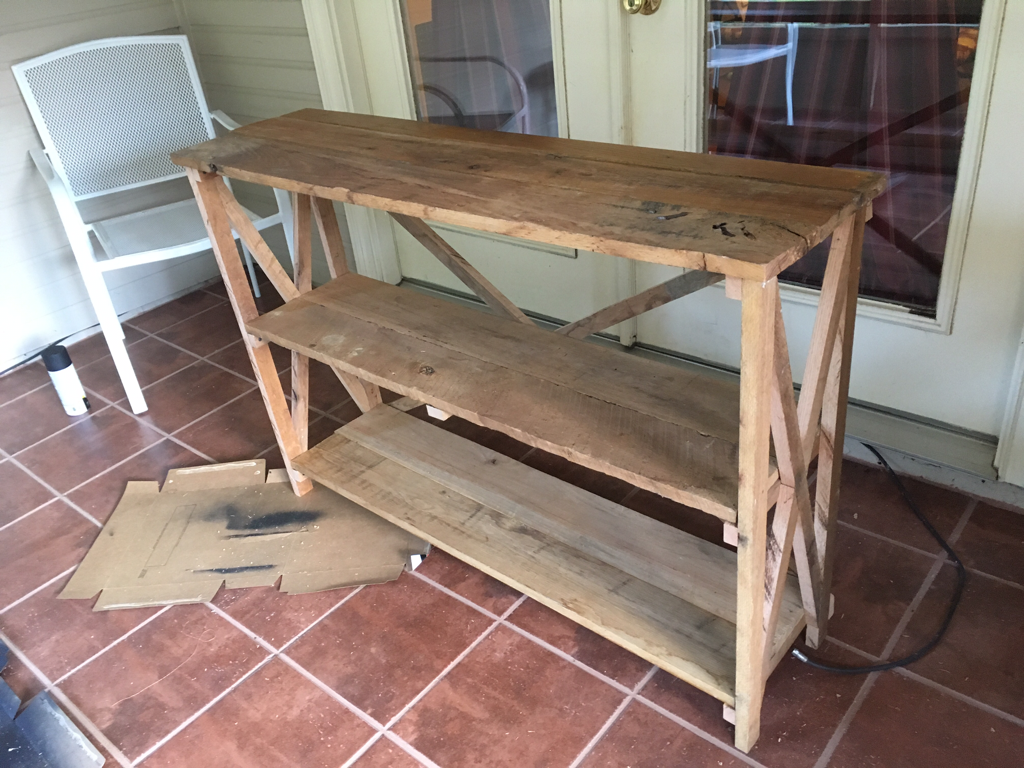
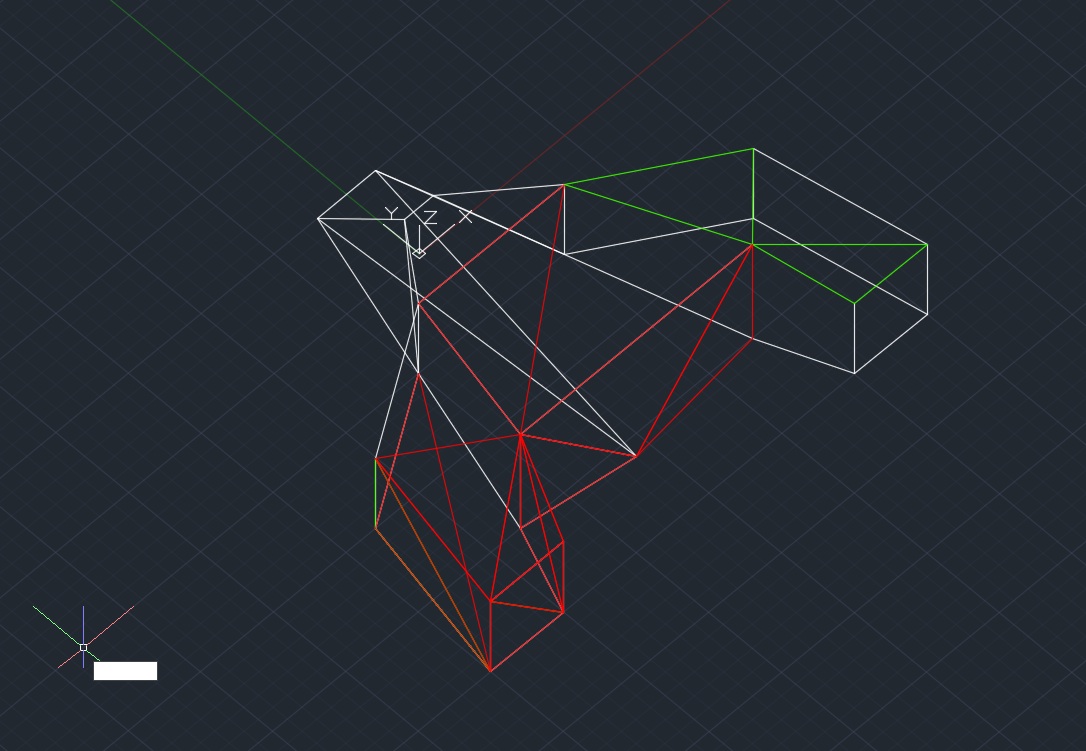
I didn't really have a firm design when I started, so as I went along I just made sure things were fitting. I started by cutting the base and checking to make sure it would look okay. I then started measuring out how big I wanted each level. It took a bit of playing to get the height correct, but once I had everything figured out it was mostly just cutting out the pieces and putting it together. 
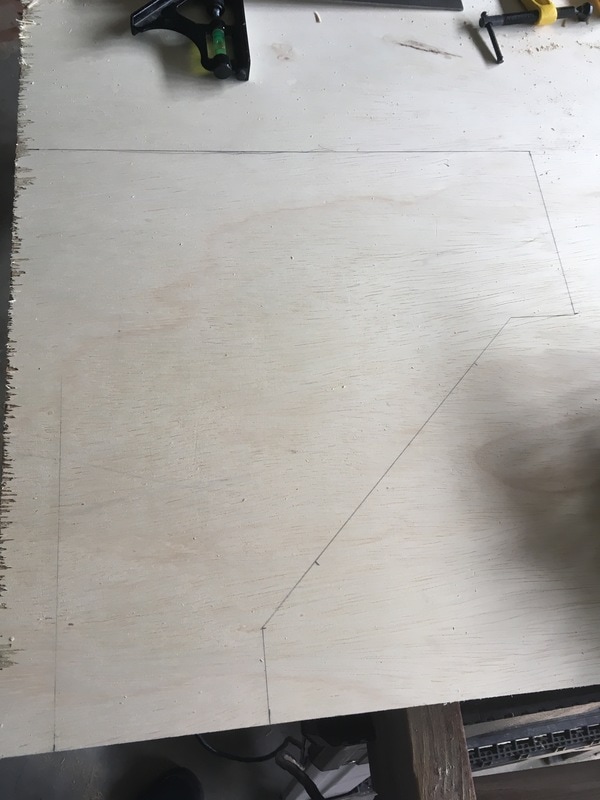
The most complicated part of the whole thing was the "condo" portion. I wanted to make sure that it was big enough that they could go inside, but still fit on top of the structure without making more problems. Based on the materials I had on hand, I figured that I could make it in a pentagon shape. 
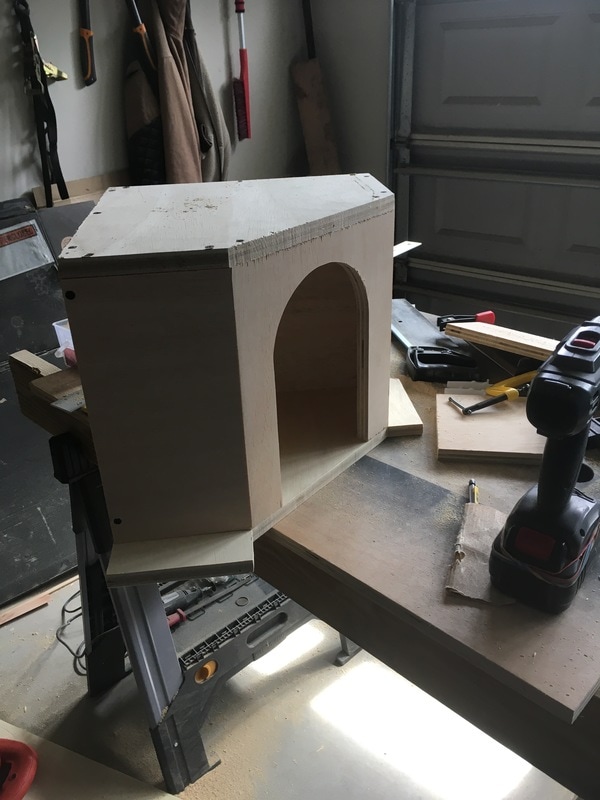
For the front door of the condo, I decided on a radius of the circle and used a piece of scrap wood to mark it. See an example here. I then used a jig saw to cut it out. It slipped in nicely and while clamped, I screwed it together. When I got most of it together, I realized I made a big mistake. There was no way for the kittens to easily get up into the condo from the middle level. They still couldn't jump quite that high, so I cut out another board to add an additional level that would give them more space. 
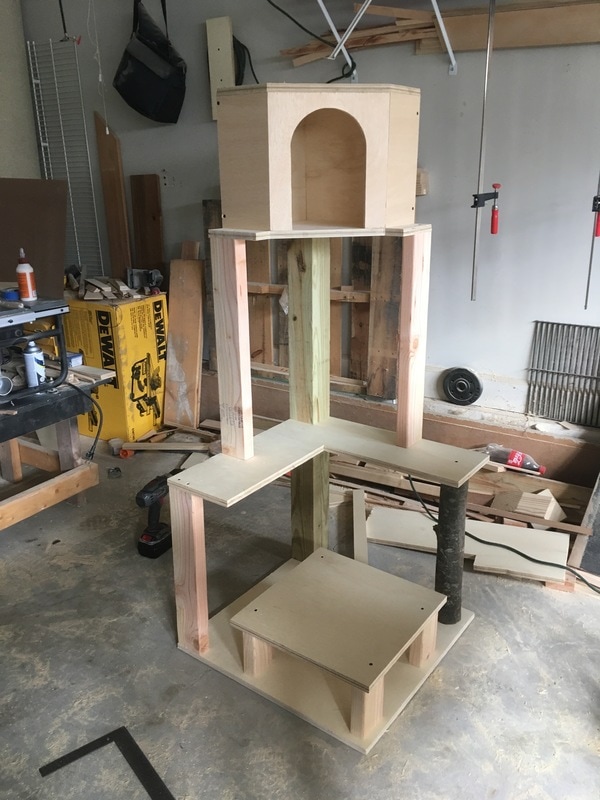
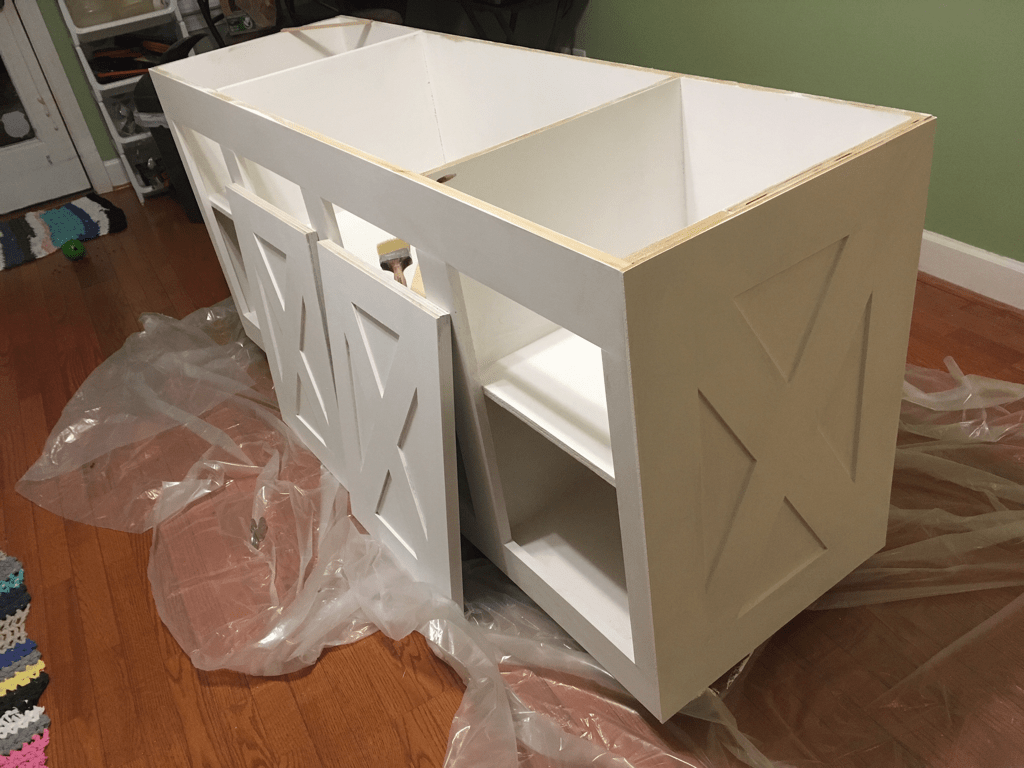
You can see a better example here of what I meant. I then took the rope and carpet and covered everything using a staple gun. It was extremely tiring and I had to make a couple of trips back to the store for more rope. 
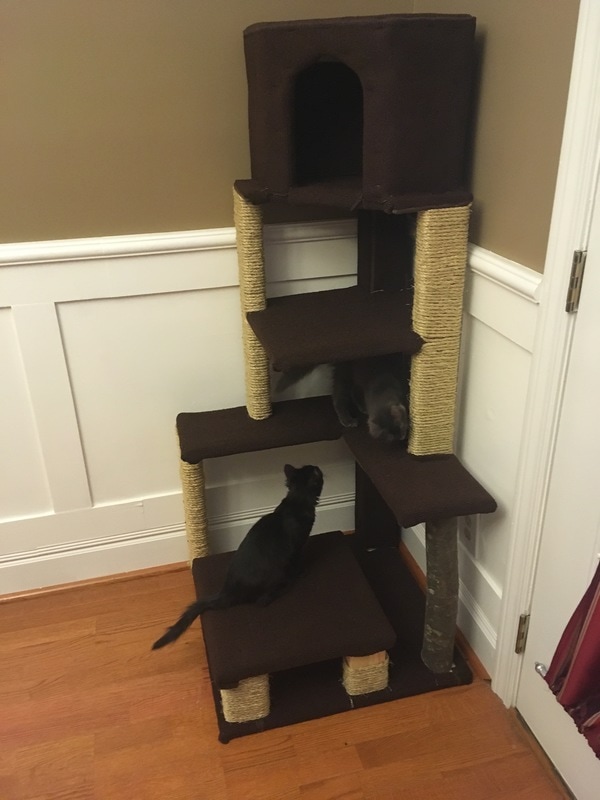
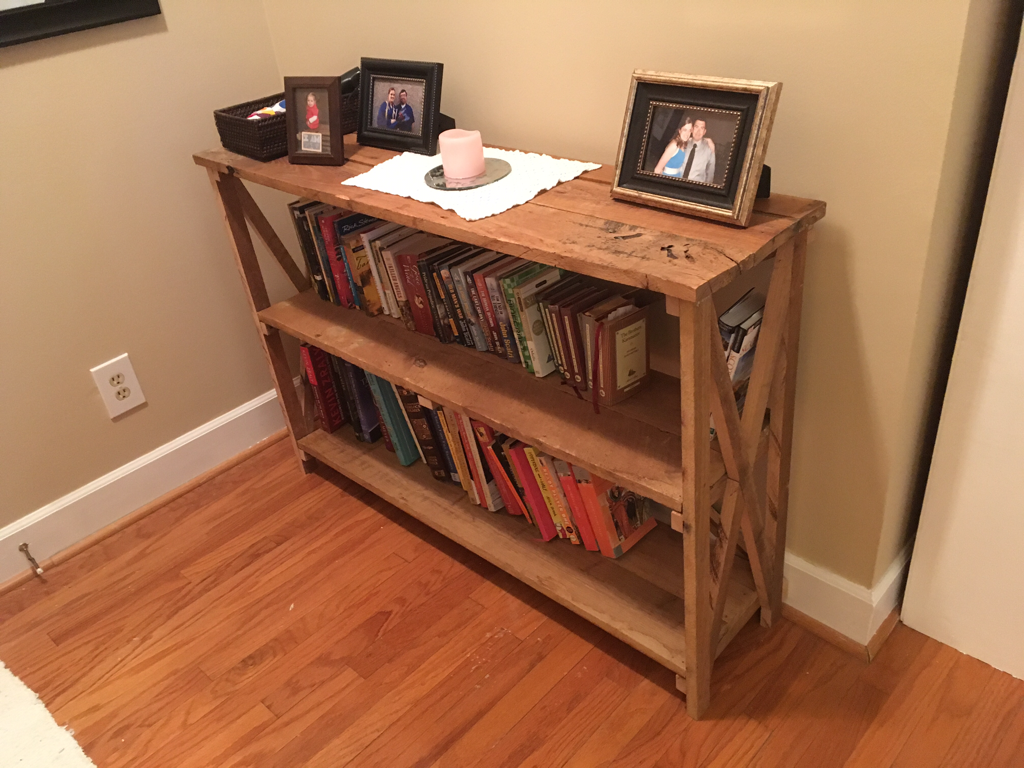
In the end, I think they enjoy it. They rarely ever go inside the actual condo, but when they do it is pretty cute.
2 Comments
I've been pretty busy this year so far and I wanted to show off some of the projects that I've already completed. If anyone has questions, don't hesitate to send me an email or leave a comment below. Hope you enjoy. I'll be adding more details to the images later on. Some of these may get their own post when I get some time to go through pictures.
Our kitchen had plenty of counter space, but once we started filling it with appliances it got quite cramped in the mornings or when we were preparing dinner. The solution to this was to create a kitchen island with more surface and storage. I started off by using 3/4 inch plywood for cabinet box. The center will have a shelf but be open from both sides. I installed 3 inch casters on the bottom so it can be easily moved around, but locked in place when we knew it wouldn't be moved much. Pocket screws were used to install the shelve and attach the front. The front is made of 3/4 inch pine screwed together with pocket screws. To give it more detail I used 1/4 inch MDF board glued to the plywood surface. After patching up any gaps with wood filler, I gave it a coat of flat white latex paint. I just wanted to let something soak into the wood first since I wasn't sure how much gray paint it would take. The top is just at 2 feet wide and 6 feet long. It's made from 8 2x4 studs with the tapered edge cut off. After much clamping, screwing, and running it through a planer, it was good enough to stain and seal. The barn door rail system was built from aluminum bars and wheels from cheap rope pullies. Lining everything up was probably the most challenging part. I installed small wooden spacers behind the bar and will use them to keep the door in the correct location. Finally, everything got put together and it is ready to have things placed inside and on top.
Recently, I was given old wood that had been stacked up in the rafters of my mother's barn. I've been working on my carpentry skills and thought some of it would make a nice piece of furniture for my new house. At times, my wife is also a fan of the rustic farmhouse style. We left the wood in its current state since that is an element of its beauty. Putting it together took quite a bit of effort. I'm not as used to working with old, hard woods. I broke a number of small drill bits trying to drill pilot holes and still had plenty of bent nails. My best advice to anyone attempting this would be to have patience when drilling or nailing. A nail gun would have been a big help. I learned that getting things perfect was never going to happen with the aged, slightly warped wood. It was a fairly simple design and I hope everyone likes what I've built. We certainly do. Normally I would post my plans, but I barely had any this time. I had a general idea of the overall dimensions, but that was about it. It was a good exercise in learning how to use my new tools and get myself outside this Labor Day weekend. I really appreciate that my mom and step-dad allowed me to take all the wood I wanted. Hopefully more projects are in the future.
After a long time of barely writing anything on this blog, I've finally taken it another step forward and started a YouTube channel. Hopefully with how easy it is to record a quick video, I can start to explore new things at a more constant rate. I hope everyone enjoys it. Before all of the boxes were moved into the house, there was a few things that we wanted to do. One of the first big projects that my wife and I took on was the kitchen. It was a nice sized kitchen with standard cabinets, stainless steel appliances, and a thick granite counter top. Pretty much a standard for a "modern" kitchen. The backsplash tile was a large stone pattern with black glass details. Overall, it was a nice kitchen. There was a few things that we wanted to change, however. The first thing was the cabinets. My wife wanted to paint them white. As you can see from the pictures, the kitchen is somewhat dark. While I enjoy a dark room, probably from my years of being a basement nerd, my wife wanted to lighten up the room and I agreed. She started on the path of painting the cabinets white using a box kit from Home Depot. This turned out to be a process that took a lot longer than we originally expected, but the end product looked awesome. While she did this, I began removing the backsplash tile. Going with the theme of making things brighter, we decided on going with a white subway tile backsplash. This was going to require all of the existing tile to be removed and the surface prepared. My first thought was to use a chissle to remove the tile. This "worked", but ended up crushing the drywall behind it. I didn't realize it was happening at first, but when you start prying the tile off by hand, large portions of drywall were coming off with it. Very soon I had fist-sized holes in my kitchen wall. I felt very frustrated with the drywall, but because of the way that drywall is normally installed, the backsplash just happened to fall along the seam and therefore didn't have much strength. Next we tried using a pry bar. This worked better, but we still had moments where it collapsed to the forces of destruction. Lastly, I realized I could just hammer the crap out of it. Repeated banging shattered the stone-like tile and caused it to rain down on the counter tops. This produced a lot of sharp tile pieces, so if you attempt this, be careful or wear gloves. Tip: Lay down some heavy duty paper on your counter top. While mine was already showing wear from the previous owner, it would of been a lot earlier cleaning up grout and adhesive later. Once all of the tile was removed, I knew I had gotten myself into a mess. I was going to have to either patch the drywall in many places, or cut all of the drywall out and replace it. I went with the second option. I figured that having a smooth clean surface would be better that a rough patch job. Using a drywall saw would of made sense, but since I didn't have one of those I just started hacking away with an utility knife. I should note now the patience of my wife. She's one to have things in a stable state. Upon seeing the half destroyed drywall, I expected the worse, but in fact she just took it in, looked at me, and said okay. It was a great relief to see her confidence in me and my budding skills. Eventually, I had all of the drywall down and the edges cleaned up. Around the cabinet trim, it was going to be difficult, but manageable to place new boards in without a large gap. I found a spot where I thought the original drywall had kept its original density and measured it. It seemed to be a half inch thick. I bought half inch drywall and began putting it up. I quickly realized that I might of made a mistake. Once screwed to the wall, there seemed to be a bit of old drywall showing. Perhaps it was actually 5/8 inch. At this point it was too late, so we soldiered on. At this point, I had pretty much been doing things that I've done before. I've put up drywall before, so that was somewhat easy. I've never laid tile before. I went to YouTube and started watching. Lots of useful videos showed exactly how to complete the process. I was still nervous though, so anyone else that is considering it, that's normal. We bought a few tubes of already mixed grout/adhesive combo. Supposedly it does both. This seemed like a bad idea to me in the store, but I couldn't think of a justifiable reason to not try it. It saved us from having to do backyard chemistry and mixing the adhesive and grout with water in buckets. I can see the benefit of doing it that way. You can alter the consistency and make a lot of it with just a bag of dry powder and a water hose. We also picked up a few tools and we're ready to go. I'll try to make a list of supplies before for reference. Practicing really helped me get some confidence in what I was doing. This may seem obvious, but I didn't want to waste too much material. Luckily, when buying the tile in the store, the woman that was helping us realized we had some cracked pieces in the case. She threw in some replacement tiles, but we got to keep the broken ones. This ended up being perfect for practicing. After practicing on a spare piece of drywall, we started laying the tile. While I was making the cuts, my wife was laying the tile. As a team, we were making a ton of progress. This was a great way to do it because it left one person in charge of laying the adhesive and planning all the cuts. It took a few days of on and off again tiling, but we got it all laid out. And it looked great. It's not perfect, but I would trust my work again. Next I came through with the grouting. We used the same material as the adhesive. It was a sanded grout, which I think might of been a mistake for 1/8th inch grout lines. (We read the container, it said it could handle it, but I wonder what it would of been like). It was a messy process, but I was amazed how the true tool that made a good outcome was the sponge. It smoothed out the grout lines and cleaned the tile in one step. We came back after the grout was dried with another wet sponge to get the film off the tile. Luckily, subway tile has a nice glazed finish so it cleaned up easy. We then sealed the grout lines with some good expensive sealer. In the final step of the process, I came back through with caulking. This was probably the easiest part of the whole process. It went on smooth and once I used a finger to smooth out the lines, it dried quick. All of those small areas along the edges that stood out were easily covered up with the caulk. I then came back through with a putty knife and cleaned all the excess caulking away and scrubbed down the counter and backsplash with a rough pad. With the counters cleaned, the cabinets painted, and the backsplash in place, we finally started unpacking our kitchen. It took us many evenings of work, but it was something that could be done by a novice that's willing to learn how. I would say that this is a task that a lot of people could do. I highly recommend going online to YouTube to find some videos that show how to do this. One thing that I found, is that everyone will have a different idea of the correct way to do it. I'll post some videos below. As long as you don't rush the job, and are not afraid to try something new, it can be a fun experience. Many thanks to everyone who gave advice and especially to my aunt and uncle for lending me a tile saw. It was invaluable and any tile job should use one. This is my first update using the mobile application so I expect it to be a little dry on the visuals and style. I haven't had a lot of time lately to blog about my projects, hobbies, and interests. After graduating college I immediately began working for a railroad as part of their Information Technology department. It can be interesting where people end up. Recently, I purchased a house with my wife. One day I might list out how that process worked so that anyone else out there that is thinking about it has a good understanding of what that takes. Spoiler: Mostly patience and money. So, with the house, this gives me a large range of projects that I want to explore. Some of them have gone pretty well so far and have given me a lot of learning experiences. Tile backslashes, electrical issues, and gardening are just the start. Beyond the physical projects, I've given technology attention as well. I have plans to start developing a webpage to host my material. Hopefully one day you are reading this on that page, as I plan on migrating all of my material over. Better not waste any content! Hopefully this Weebly mobile application works and gives me a better method of posting more often. Thanks to anyone who wanders by my little area of the Internet. More to come...
November 21: For our final project, we are to create a simple space racing game in Java with OpenGL. This is suppose to bring together all of the skills that we have learned over the semester. It will have a space ship, a star field sky box, and numerous asteroids. I'm actually very excited about this project, because I've enjoyed the class so far and I think it will be a good exercise. Let's hope it goes well. There has to be a heads-up display (HUD) for a perspective that is suppose to be from inside the ship's cockpit. In an earlier project, I made a HUD that was pretty simple. It just showed a fake mini-map and text representing the camera's current position. I think this will be very similar, except with more detail. I think we will attempt to represent the inside of the ship using some textures found online. November 22: The ship is coming along slowly. I originally planned on using Blender like I have before for some of my other projects, but I haven't used it in a while and ultimately I would have the same issue of trying to parse an .obj file into workable OpenGL triangles. So for now I'm doing it the hardest way possible. I've drawn a simple ship in AutoCAD and slowly been extracting the vertices of each triangle. I feel like doing it this way will give me better control, but more time used up. The red lines are the triangles that I've already copied over and have being rendered in OpenGL. I usually bring the vertices in one set at a time to make sure everything is working fine. One note that I've found; my OpenGL world is currently in the Y+ is up, while in AutoCAD, Z+ is up. Not a huge issue since it's space, but still.
None of the following photos are my property and links are provided to original content Recently I came upon the story of Joe and Nicole Naugler, a family that had their ten children removed by child protective services. By the time I write this, it seems that they have had the children returned to them. There have been numerous articles and blogs (pro and con) written about the family and the conditions that their family lived in west of Elizabethtown, KY. While some claim the reason the children were taken was that they lived a different lifestyle (that the public doesn't understand) or that the kids were homeschooled, this is not the case. The homesteading lifestyle can be done without endangering yours and your family's lives. Lately I've taken a deeper looking into what is known as "off the grid" living. For the most part, this means that someone wishes to live without connection to modern utilities. It also has strong ties to those who wish to be self-sufficient and live off of the land. Many see it as becoming less dependent on "things" - a minimalistic philosophy. As anyone can see, going off of the grid can be done for a number of reasons. I personally would like to start adopting the lifestyle in small steps. According to an interview with Off the Grid News, the family finally decided to start this life style "by jumping in with both feet". They claimed that this was the only way they could actually start. I can somewhat understand this since some people have a hard time making headway into a project (I'm guilty of this as well). They wanted to go through this experience and document it as a way to share their testimony with the world. They also stated that they wanted their kids to share in this lifestyle so they could have a first hand experience (as opposed to being told about it). The issue with jumping in means that you risk going into it with little preparation. This seems to be an issue with the Nauglers. They say they have been doing this for years, but they currently have a three sided shelter with an open "patio" area. The covered area seems to have a pallet/plywood floor. They claim they use very little electricity, using a generator when they need it. Here is a link to the public Facebook page that has more photos: Obviously there are many things that can be said about the way these people live. The thing I see is that they seem to be attempting this lifestyle with little resources. I can appreciate that they are using fallen wood/branches for fencing. It doesn't look great, but if it keeps goats or rabbits out of the garden then good. The issue comes when it's the walls of your living space. This property reminds me of a dwelling in another place in the world (South Africa). I could continue with all of the issues, but that is not my point in writing this. There are better ways of approaching the "off the grid" lifestyle. Others have done it in much classier ways. As a fellow Kentucky resident, who has worked on a farm with livestock and spent years overseas in impoverished areas, I feel that someone who chooses to live like this is not doing it right. Next I would like to shed light upon another family who has gone off the grid. A sample of the photos from their blog: This family also has a garden, live stock, and a child. Granted, they don't have ten children, but that's even more reason to have adequate space for them. This family raises chickens and bees. They have a large garden and sell vegetables and honey at farmer's markets. There are many similarities between the two families, but also many differences. The big difference that I see between the two different groups is that the Nauglers are embracing a much rougher "off the grid" experience. Some commenters referred to it as "more homeless than homestead". Putting forth effort to keep the area clean and neat go a long way. If the Nauglers had kept the burn pit tidy, trash in the burn pit and not next to the large fire pit that children sleep around, and solid walls with better flooring, then maybe CPS and sheriff deputies wouldn't of reacted the way they did. Most mainstream people see those who go "off the grid" as an outcast group of hippies, paranoid doomsday "preppers", or cult members keeping their family away from society. The biggest issue is that some sites, which promote this lifestyle, are defending the family's claim that their rights are being violated and that the government is out to get us. These sites are ignoring the issue of possible child abuse and rather taking a "parents know best" attitude.. This shows that ultimately, there are two subgroups of "off the grid" people being represented by different outlets. Sadly the Nauglers are getting additional news coverage due to there issues with local authorities and rallying support for their form of "off the grid" lifestyle through news outlets and social media. As I said before, one day I would like to embrace some of the aspects of being off of the grid for many reasons. It truly hurts my case when fellow Kentuckians show such an ugly example of the lifestyle. They need to stop making claims that the government is trying to take their kids away because of the lifestyle. The lifestyle is perfectly capable of raising children that are not covered in dirt or sick and sleeping in the open by a camp fire (after having eaten spoiled food). The moral of this story is that when it comes time to start a new lifestyle, please take the time to prepare for what is to come, since that is another aspect of what drives people to live "off the grid".
Recently, I've gotten married. This has made me starting thinking even more about my future goals. In the past, I could always just push off the idea of figuring out my life to another day. It was always refreshing to have unlimited options in front of me. The good thing about getting married, besides having a loving partner to experience life with, is that it forces me to start setting goals and working towards that future. Below in this blog I begin to list out and explain my desires for the future. Soon, I will be moving to Atlanta where my wife will be attending graduate school at Emory University. I will be graduating in December with a degree in Computer Science and a minor in Mathematics. Once I get down there, I will be looking for a job. All of these things are extremely exciting when I start thinking about it. Atlanta will hold interesting opportunities for both of us. Now that I have a setting for our immediate future, I can start to think about what I want to accomplish. The number one thing I want to do is thatI want to own a house with enough land to accomplish my goals. This is sometimes what people call the American Dream, but I just feel it is a smart decision. For the first year we will have an apartment, but after that I would like to have a home for a few years. With the cost of living in Atlanta, in any place decent, I just feel spending a thousand dollars a month on an apartment with nothing to show for it at the end is a waste of money. If I can manage to find a place for the right price, I would love for it to have enough land that I could do a few projects I've always wanted to attempt. It is my goal to one day utilize alternative energy sources at home. I know that living somewhere in or around Atlanta, that I won't be able to fully separate myself from "the grid". I would love to have complete autonomy, but I'm not sure this is possible for a few reasons.
A few solar panels to feed a small electrical system for a workshop or shed. Each of these panels cost around $150 a piece. This is why I won't be starting with anything larger. It would save me from having to wire electrical connections from the house and save money by not using grid electricity. Naturally I will need additional equipment, but here is an idea of the things I would need for this smaller project. This image seems to be for a trailer setup, utilizing DC ports for 12v applications (not having to convert DC to AC conserves power). A workshop wouldn't require electricity all of the time, since I would be still working full time at a regular job, so using solar to store up energy in a battery bank to be use later would be beneficial. Lighting could be probably taken care of using 12v LED lights instead of normal house lighting. Tools could be plugged into the 110v AC system. If the system works out, then it could be extended to other yard applications (such as garden irrigation or outdoor lights). My next large goal is that I would like to grow my own food. This was once a new years resolution that actually came true. I once experimented by growing a small garden in a 40 gallon aquarium in the living room of an apartment. That required a lot of patience and grow lights. The single cucumber plant that survived to maturation yielded only a couple of cucumbers. I would like to take this experience further and have a small garden in the backyard in some raised beds. With the longer growing season in the south and the benefits of eating more vegetables, I think this would be a worthy attempt. Seeing so much reliance on grocery stores, which then puts more pressure on the local/global system of food production, I feel that producing some food for myself and my family would help. Since being in a relationship with someone who came with a better appreciation of eating healthy, I've started enjoying a wider variety of vegetables. In my garden, I would like to grow some common plants such as cucumbers, squash, corn, tomatoes, peppers, etc. I would also like to try growing herbs. In the spirit of trying to conserve resources, I might even try composting and rain water collection for the garden (if that's not against the law in the area that we live). All of these ideas are just that. It's pointless to make any concrete plans until I know where I will live or what space will be available. When the time comes I will expand on each of these topics.
|
AuthorChristopher Curtis Categories
All
Archives
April 2017
|